This will be a long post…
With the cumulative update (CU) 6, on 5 August, the SDL BeGlobal Community was replaced by the SDL Language Cloud. It offers many more options and hence requires a sub-section of its own, which will be included in the upcoming update of the 2014 version of the manual. (Note, however, that this applies only to the 2014 version of Studio. Users of the 2011 and 2009 versions still have access to the BeGlobal Community but not to the Language Cloud.) The SDL Language Cloud gives you the following options:
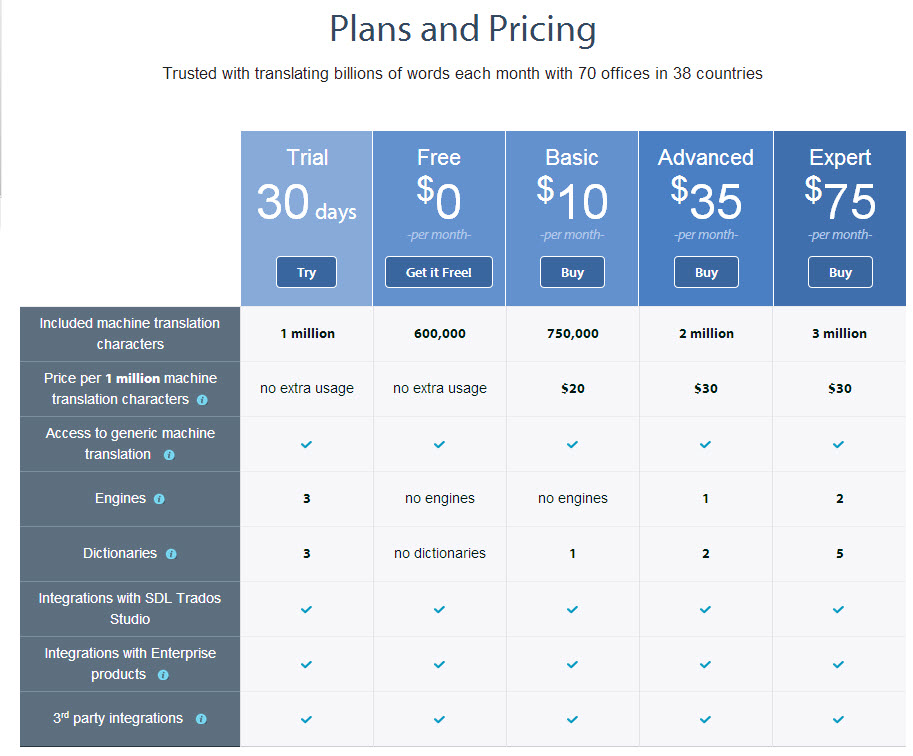
- Free access to the roughly same facilities as with the BeGlobal Community, only under another name. It is restricted to searching for 600,000 source text characters per month (more than for BeGlobal, where it was 4,000 words per day).
- Basic access, at $10 per month, to 750,000 characters per month (extra characters at $20 per million), plus the option of using one dictionary (i.e. a dictionary for one language combination), where you can upload any number of your own suitable dictionaries. More on that below.
- Advanced access, at $35 per month, to 2 million characters per month (extra characters at $30 per million), plus the option of using 2 dictionaries and 1 specially trained and industry-specific machine translation engine.
- Expert access, at $75 per month, to 3 million characters per month (extra characters at $30 per million), plus the option of using 5 dictionaries and 2 specially trained and industry-specific machine translation engine.
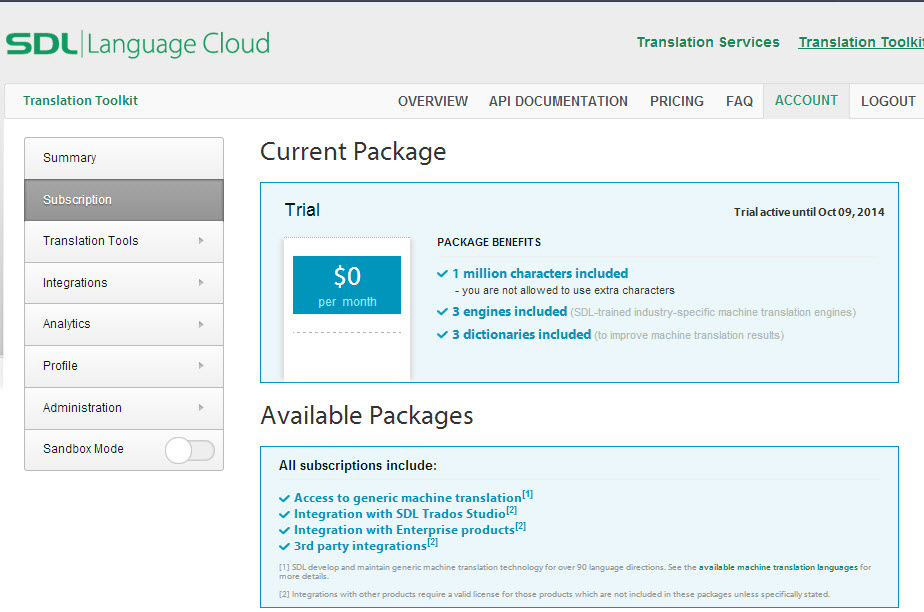
You can try this out for free during 30 days. The trial includes 1 million characters, 3 dictionaries and 3 engines. For those who are familiar with API programming (I’m not), there is also the SDL Language Cloud Translation Toolkit (at https://languagecloud.sdl.com/translation-toolkit/api-documentation), which enables developers to submit content for translation via the SDL Language Cloud translation platform.
Getting started
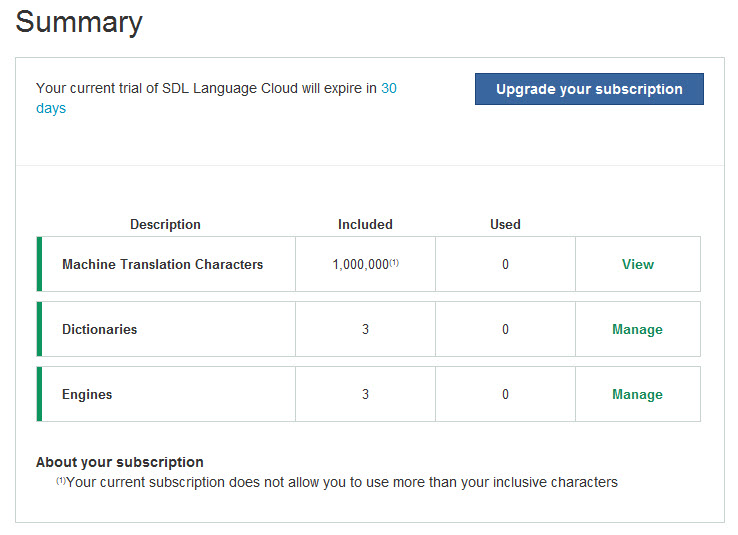
If you don’t have a Language Cloud account when you open Studio, you will be greeted with a Welcome to Language Cloud window. Click Next, log in, and then click Finish. This establishes your account with Language Cloud, and the 30 day free trial will be activated at the same time. Next, go to File > Language Cloud. The LC account summary will open in the right-hand pane, detailing the details of the trial option:
When the trial period is over, you will be requested to select a subscription option.
The SDL Language Cloud page
All manipulations of your Language Cloud account is done on the SDL Language Cloud page, which you reach via Studio: Go to File > Language Cloud, then select the Manage Subscription button (or, as the case may be, the Upgrade your subscription button). You will be taken to your account page, showing your Current packages:
– Plans and pricing: If you want to see the different options (or select one of them), select the Pricing tab:
– Available languages: On this page there is also a link to a list of all available languages (you can find it direcly – without being logged in – at https://languagecloud.sdl.com/translation-toolkit/available-machine-translation-language-pairs).
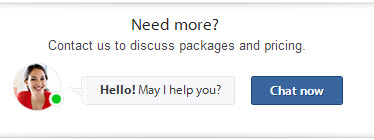
– Customized package: If In addition, you can have a subscription package taylored to your specific needs: scroll down to the Need more? part:
As for the other tabs – Overview, API Documentation, and FAQ – I leave them for you to investigate.
Dictionaries
A dictionary in the Lanugage Cloud is an empty container specifying source and target languages, and you then fill with content of your own. The difference between having those entries automatically looked up in a MultiTerm termbase and in a Language Cloud dictionary is that in the former case you will see the hit in an AutoSuggest list – and have to select it manually if you want to use it – whereas in the latter case it will be automatically inserted into the machine translated target segment.
– Add a dictionary: On the SDL Language Cloud page, go to the left-hand menu and select Translation Tools, then Dictionaries. The Dictionaries pane opens. If you haven’t created any dictionaries, you’re invited to do so. Otherwise, the pane looks like this:
Click the New Dictionary button. The Add a New Dictionary pane opens: 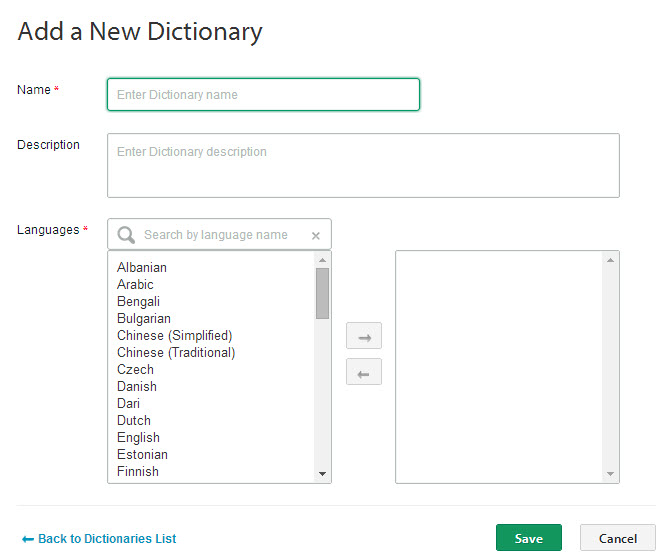
Fill in the fields and select languages, then Save. Now you can import content, or you can do it later. The Dictionaries pane will list the new dictionary (dictionaries).
– Import dictionary content: You can, at any time, import new content into your dictionaries. Go to the Dictionaries pane as described above. Click the Edit pen for the dictionary in question:
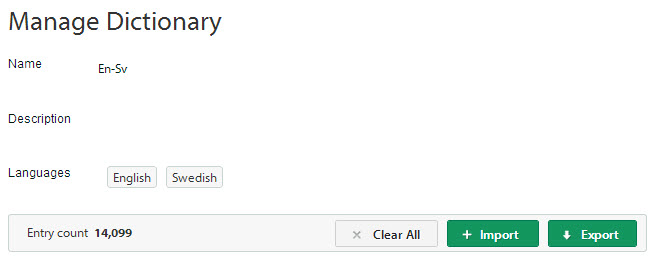
The Manage Dictionary pane opens:
Click the Import button and upload your dictionary file (must have a TBX or XML file extension, TBX being the XML-based standard for exchanging terminological data). Note that neither the Studio SDLTB nor the old MTW will not do, so you may need to open the dictionary in MultiTerm and export it to the appropriate format. (In the Upload file box which opens when you click Import, there is a link – Learn more – to Knowledge base entry #5267 with a video showing the full import process including how to export from MultiTerm.)
Note: To get the best results you should simply your termbase, making it one-to-one (synonyms are not handled intelligently in Language Cloud dictionaries). This dictionary function is at its best when you are using very specific terminologies, such as for brand guides.
In the same Manage Dictionary pane, your imports – successful and failed – will be listed in an Import History list.
– Search for dictionaries: On top of the Dictionaries pane (see above) there is a search field. It is used for searching for a particular dictionary. Why would you do that when even the Expert subscription only gives you 5 dictionaries? The answer is found further down on the pricing page: “Need more? Contact us to discuss packages and pricing.” If your needs are such that you handle 30 different dictionaries (or millions of words per day), there is a solution for that, too. And then the search function (plus the box for specifying how many hits per page you want) may come in handy.
Engines
An Engine is a more or less specialised application of machine translation. The one which is included in the free option is the same as before, in BeGlobal Community, which means a general content TM for automatic translation much like Google Translate or Bing. For the paid options, there are specialised engines – currently, however, only with English as source. This is because so far, these are the only ones “trained” enough to give demonstrably better results than the standard ones. (I haven’t checked this myself.) The domains of specialisation are Automotive, Electronics, IT, Life Science, and Travel (not all of them are available for every language combination).
(The training of an engine – possible if you use BeGlobal Enterprise – requires statistically significant volumes of translation data, preferably more than half a million words per update. For an organisation doing a lot of translation this may be a worthwhile exercise, but it is hardly useful for the freelance translator.)
– Select engines: On the SDL Language Cloud page, go to the left-hand menu and select Translation Tools > Engines. Then click the engine(s) you need. Once you have saved your selections, you cannot change them until the next billing period – see below.
Billing period
To see your current billing period: On the SDL Language Cloud page, go to the left-hand menu and select Subscription. You can change between Auto-Renewal and manual renewal anytime you want. Just click the left-hand or right-hand part of the Auto-Renewal part here:
In this example, the Auto-Renewal option is on, and the wording “Active until” means that the subscription will be automatically renewed on the specified date. If the Auto-Renewal option is off, the corresponding wording will be “Expires on” (which is a lot more clear than “Active until”, I would say).
Current subscription status
You can always see the current status of your subscription (package type, how much you have used, etc.) on the Summary pane which opens when you select, in Studio, File > Language Cloud.
Menu items
The left-hand menu of the SDL Language Cloud page gives access to resources as follows:
Summary: The summary of your current subscription activities (see above) which is also shown in the Studio window via File > Translation Cloud.
Subscription: The Current Package / Available Packages pane (see above).
Translation Tools: Sub-items Dictionaries and Engines (see above).
Integrations: Sub-item API Keys; for the creation of API keys (for more information, select the API Documentation tab).
Analytics: Sub-items Machine Translation and Human Translation; for reports on your usage of those features.
Profile: Sub-items User Information, Account Information, and Password.
Administration: Sub-items Account Balance, Billing Details, and Translation Limits.
Important!
Make sure to read Paul Filkin’s multifarious posting on this topic – particularly if you’re a 2011 user who has run into an error message telling you that you have exceeded the maximum number of words per day, even though you know you haven’t.




 Posted in